MySQL 준비 단계
xampp (번들 툴) -> 이걸 설치하면 기본적으로다 설치됨.
1.
DBMS->웹서버를 구현할거임
-> 자바스크립트(node.js) 와 데이터베이스를 연동할거임.
회원가입, 글쓰기, 글수정 할 수 있는 백엔드 서버를 구현할거임.
start를 눌러야 서버가 열린다.

config -> my.ini 클릭
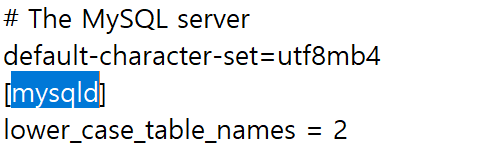
매모장에서 mysqld 밑에 lower_case_table_names=2을 입력하고 저장 (테이블 명이 소문자가 가능하도록 허용해줌)
2.
start를 누른 상태에서 (동작하는 상태에서)

Shell을 클릭해 준다.
mysql -u root 를 입력해줌
GRANT ALL PRIVILEGES ON *.* TO 계정이름@`%` IDENTIFIED BY '비밀번호'; 입력으로 사용자 생성

사용자 생성 성공
https://github.com/webyog/sqlyog-community/wiki/Downloads
GitHub - webyog/sqlyog-community: Webyog provides monitoring and management tools for open source relational databases. We devel
Webyog provides monitoring and management tools for open source relational databases. We develop easy-to-use MySQL client tools for performance tuning and database management. Webyog's solution...
github.com
MySQL 툴 설치 (SQLyog)

위에서 생성한 사용자를 입력하여 들어가자.